Most players skip replay review because it feels like homework: forty minutes of watching yourself lose. It does not have to be. With Repalyzer you can get the useful part out of a game in about ten minutes, and leave with one concrete thing to practise. Here is the routine.
Pick a recent loss in a matchup you play a lot. A loss teaches more than a win, and a recent game is still fresh in your memory. No replay at hand? Follow along in the demo below. It is already open on Light vs Soma, the game used for every picture in this guide.
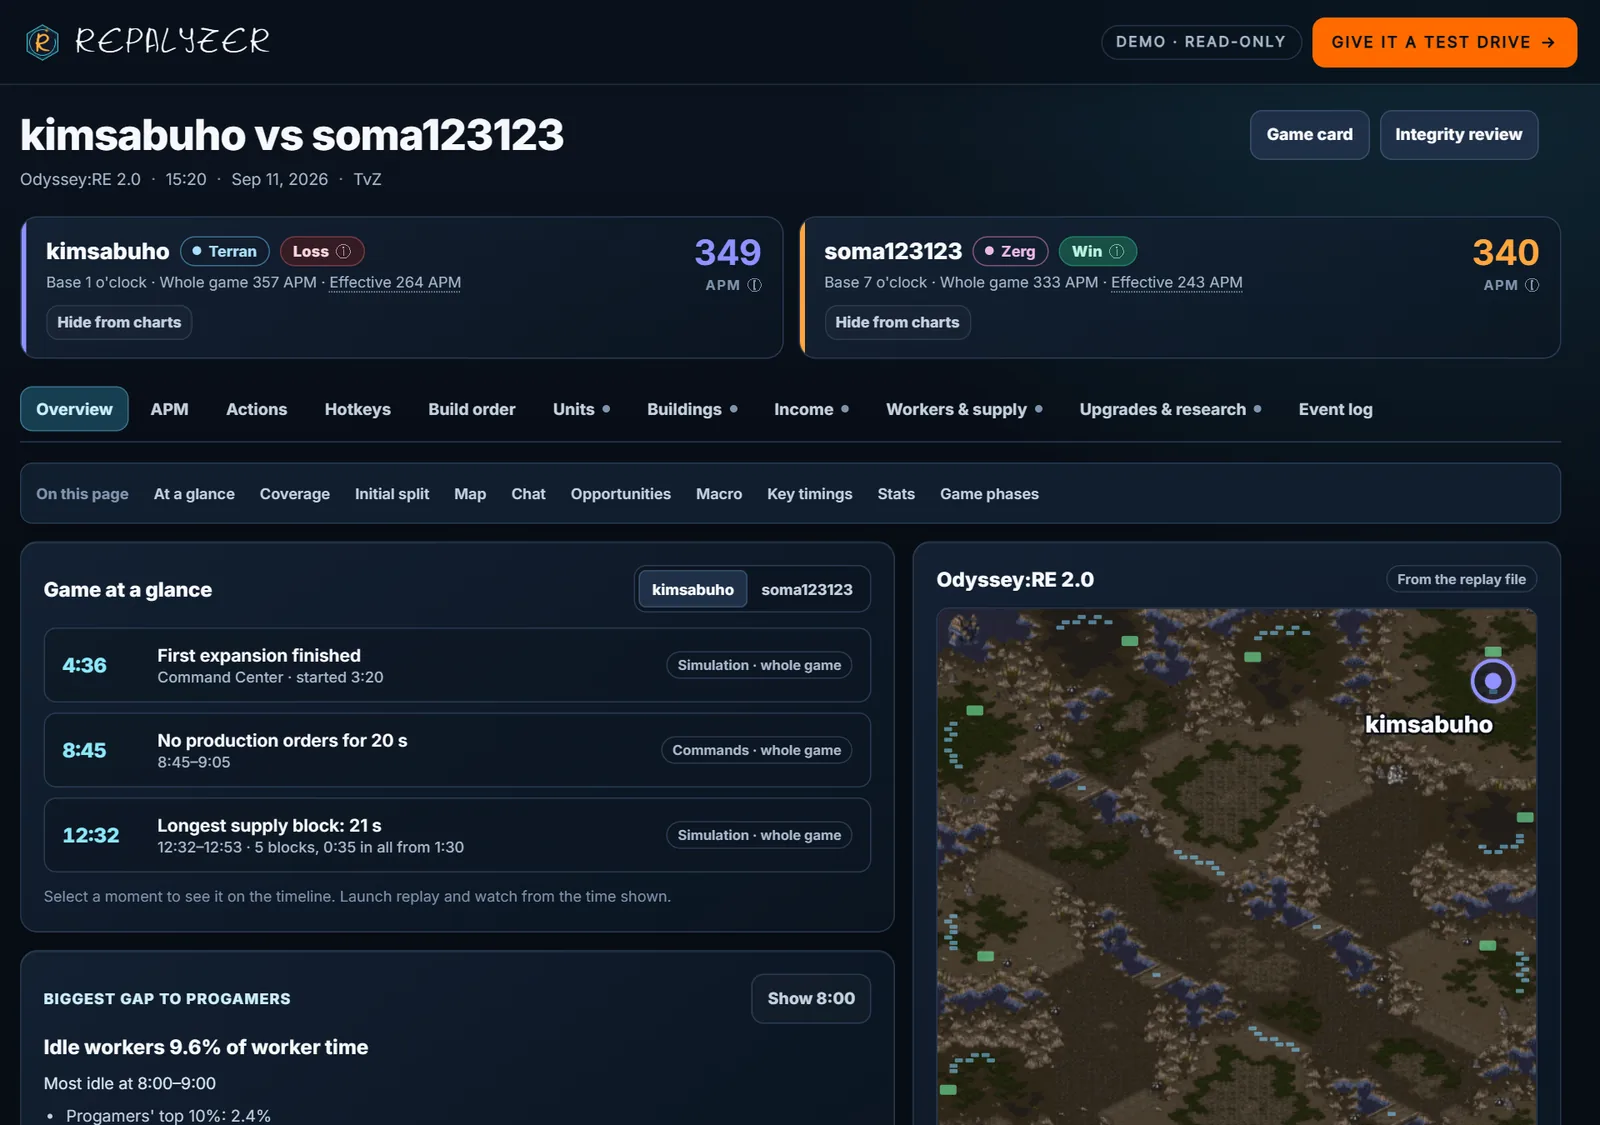
The real Repalyzer interface, running in your browser. Every “Open this view” link below moves it to the tab and minute in the picture.
Minute 0–1: Open the game
Find the game in Local Explorer and click Repalyze, or double-click the .rep file if Repalyzer is your default replay app. The simulation takes about a second. Make sure the player selected on the cards is you; Repalyzer picks the player marked "This is me" when you played in the game.
Minute 1–3: Game at a glance
Start with Game at a glance. It shows the three moments that decided the game, plus the Opportunity report: moments where money, production or larvae sat unused.
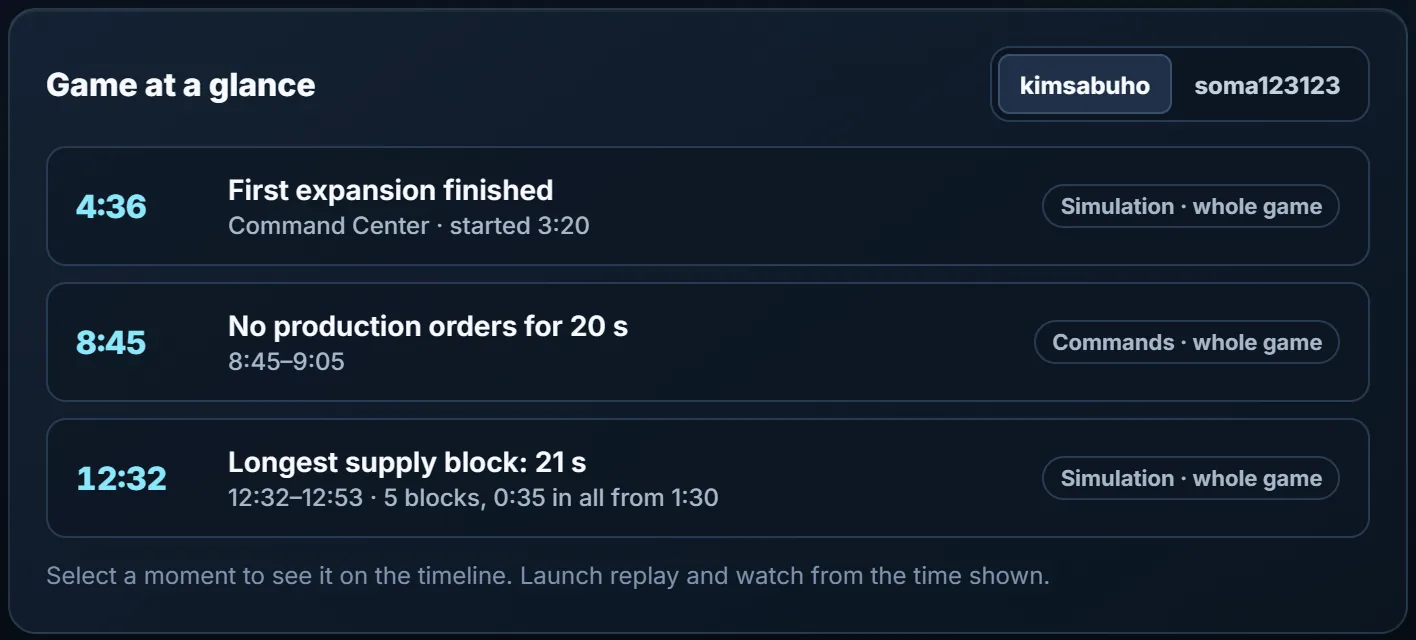
- 1First expansion finished at 4:36: on time for this build.
- 2No production orders for 20 seconds at 8:45: the moment the rest of this review keeps returning to.
- 3Longest supply block, 21 seconds at 12:32. Click any moment to jump the charts there.
Read the decisive moments first and ask: did I know this was happening at the time? A lost fight you remember is less interesting than a 40-second stretch where your income stalled and you never noticed.
Treat the Opportunity report as a list of suspects, not a verdict. Repalyzer cannot know what you intended. If you were banking minerals for a tech switch, a pile of unspent money was the plan, not a mistake.
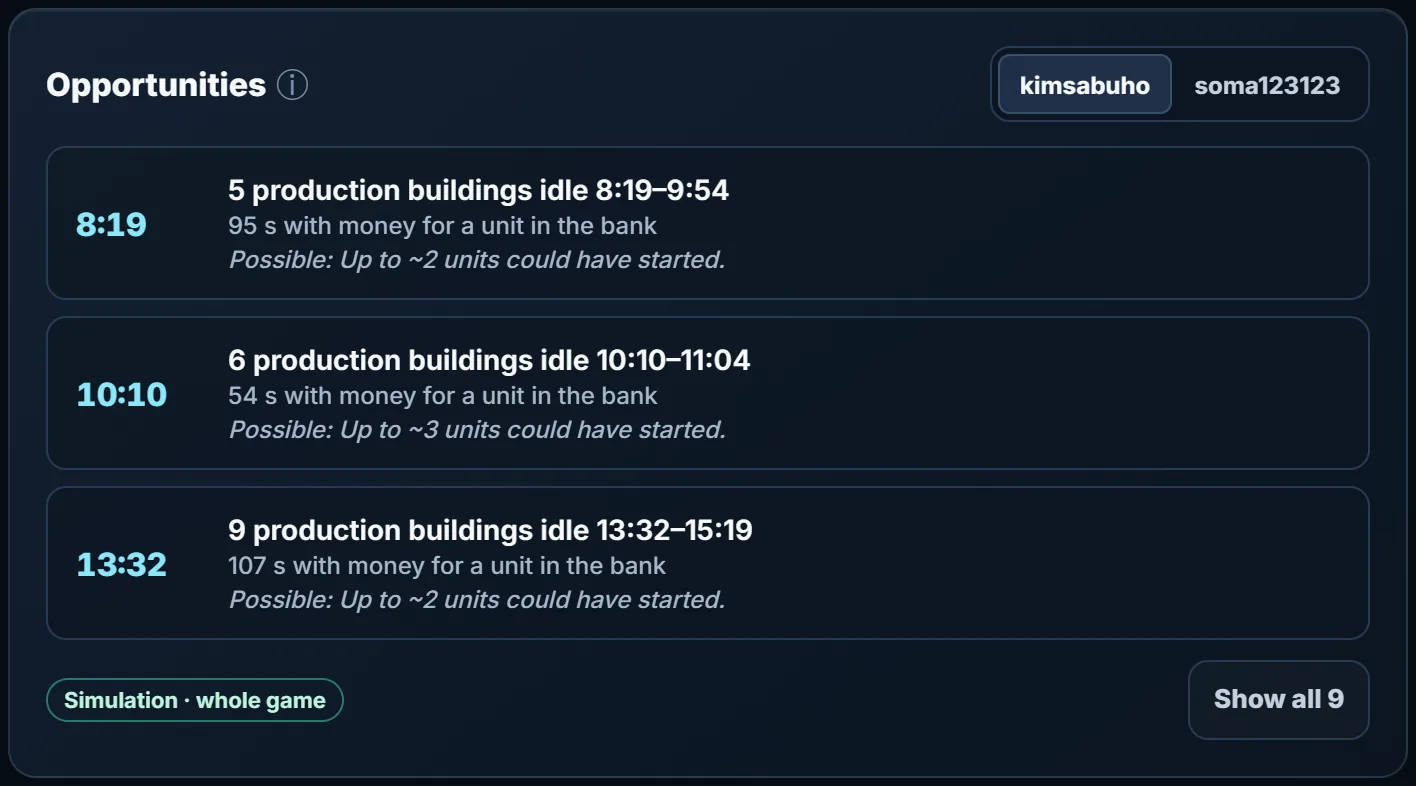
- 1Five production buildings idle from 8:19 to 9:54, with money for a unit in the bank.
- 2Six idle from 10:10 to 11:04.
- 3Nine idle from 13:32 to 15:19. The windows grow as the game goes on: a habit, not a one-off.
Minute 3–4: One thing to fix
One thing to fix names your biggest gap in one line. It looks at four measures (Macro, Idle workers, Hotkeys and Speed) and picks the one where this game fell furthest below your usual games in the matchup. It also gives the worst minute, with a button to jump straight there.
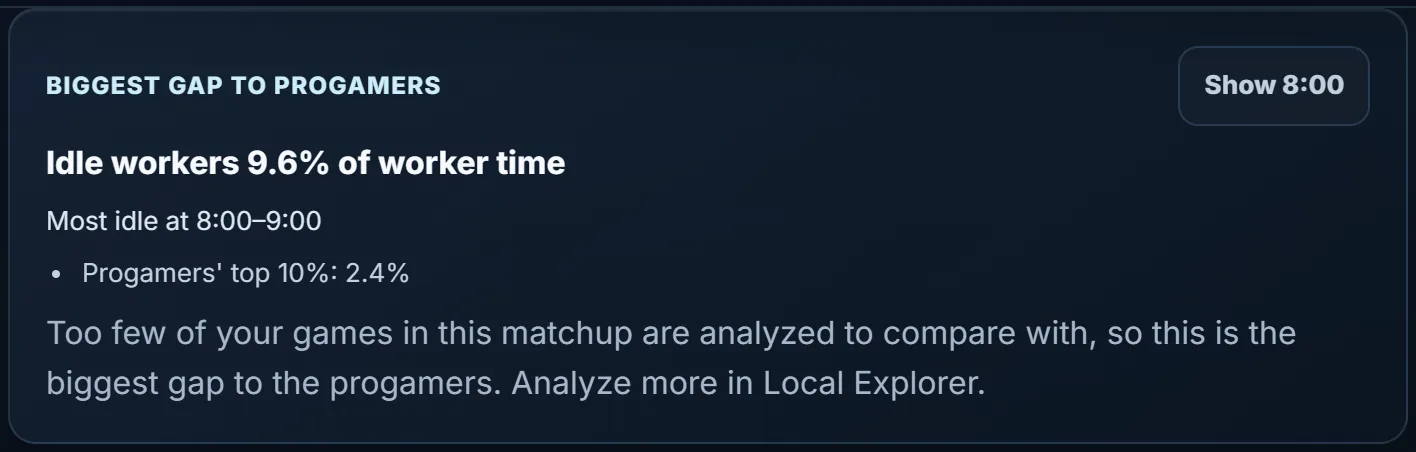
- 1“Biggest gap to progamers”: too few of Light's games are in the library, so the card compares with progamers and says so.
- 2Idle workers: 9.6% of worker time, worst between 8:00 and 9:00.
- 3The best 10% of progamer games sit at 2.4%.
- 4“Show 8:00” jumps to the worst minute.
This is the most important line on the page. Write it down. Everything else in the review is there to understand it.
If too few of your games in the matchup have been analyzed, Repalyzer compares the game with progamers instead and says so, as in the example above. Analyze more games in Local Explorer to get the comparison with your own usual play.
Curious how it picks? Under the hood: the methodology behind Repalyzer shows the exact rule, step by step.
Minute 4–7: Go to the worst minute
Click through to the worst minute and look at the matching chart.
- Idle workers: open Workers & supply. Find when the idle count rose and what you were doing then. Usually it is a fight, a drop, or a building you forgot to place.
- Macro: open Income and the Macro rating. For Protoss and Terran this is the share of time your production buildings were producing. For Zerg it is the share of hatchery time not sitting at three larvae. The rating places this game between your worst (0) and best (100) game in the matchup.
- Supply blocks: every block is listed with its start time and length. Repalyzer counts a block as being at the cap for 2 seconds or longer, from 1:30 on, so the normal wait at the start of the game is ignored.
- Hotkeys or Speed: open the APM and Hotkeys tab. Check which control groups you really used and how much of your speed was spam.
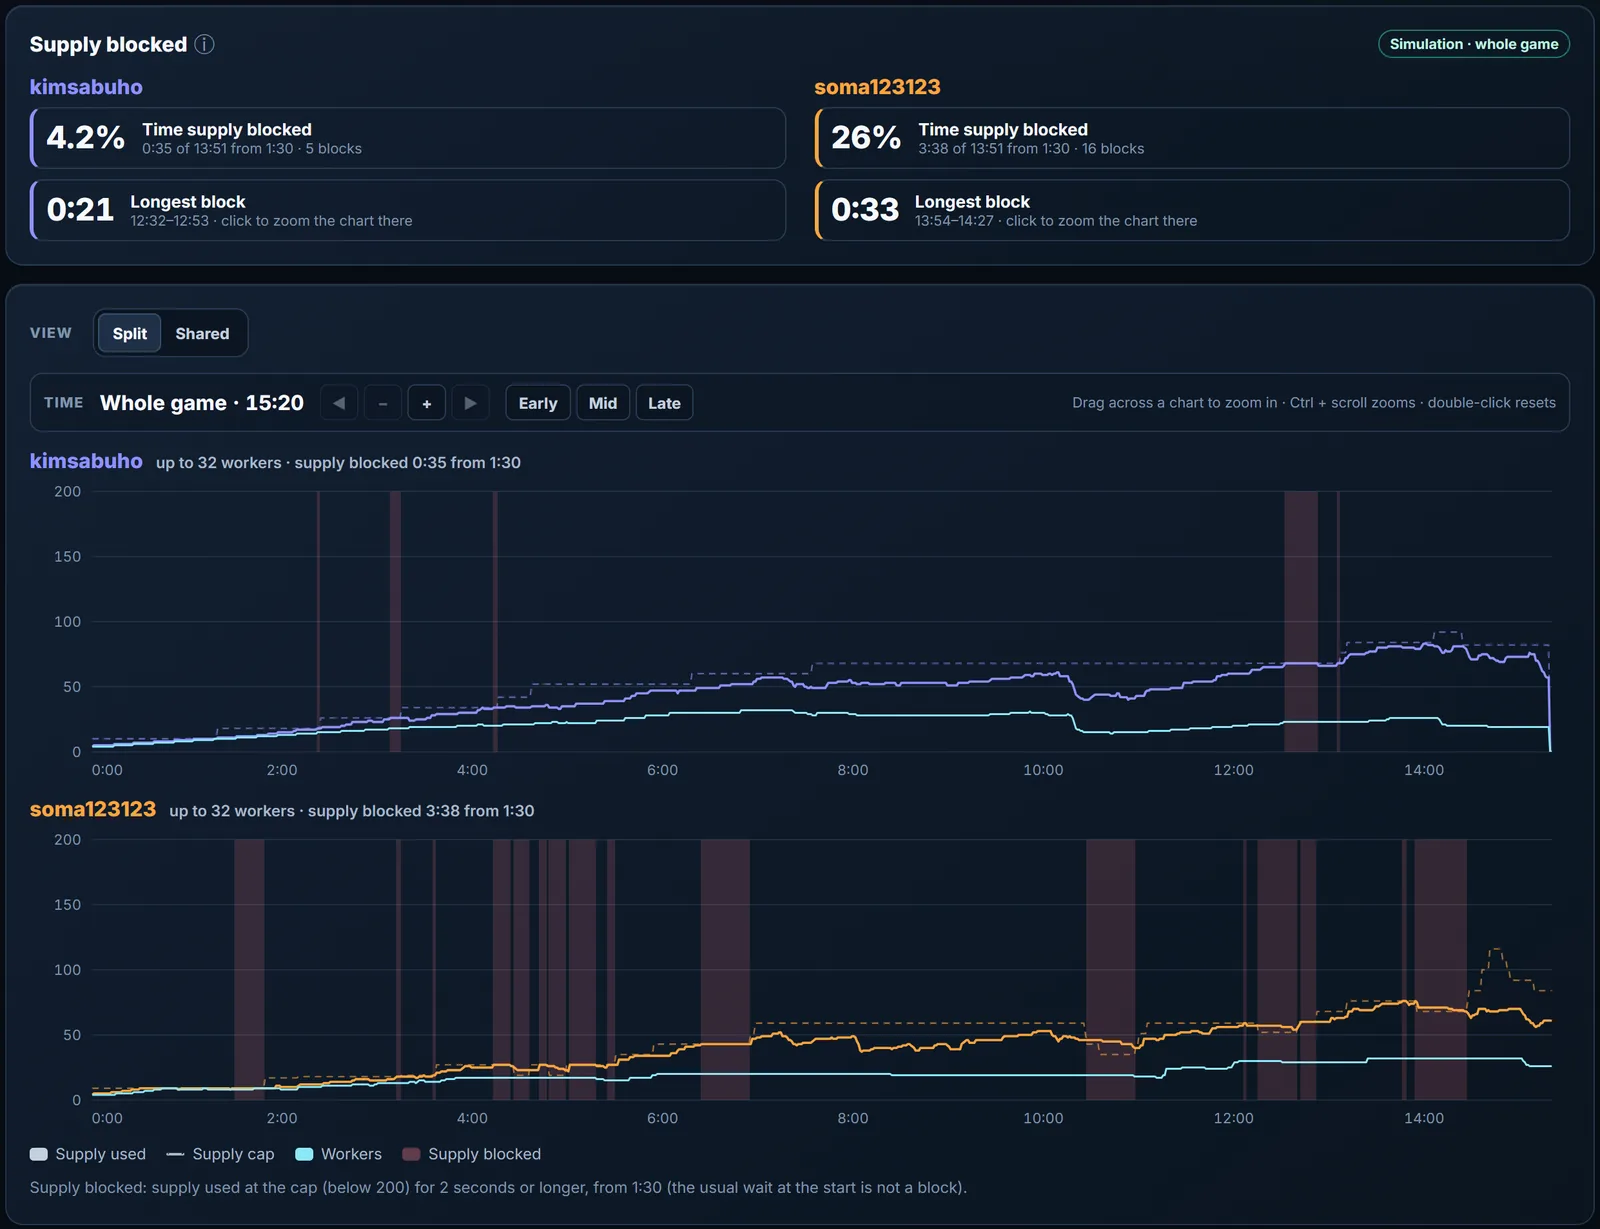
- 1Light: supply blocked 4.2% of the game, 5 blocks.
- 2Soma: 26%, 16 blocks.
- 3A shaded band: one supply block, as wide as it lasted.
- 4Light’s worker line (light blue) levels off at 32 workers around 7:00 and never climbs past it.
One note on APM. Repalyzer's main APM figure leaves out the first 100 seconds, because most players spam-click to warm up at the start. Effective APM goes further and leaves out fast repeats, replaced selections and empty actions. If your APM looks high but your effective APM is low, much of your speed is not doing anything.
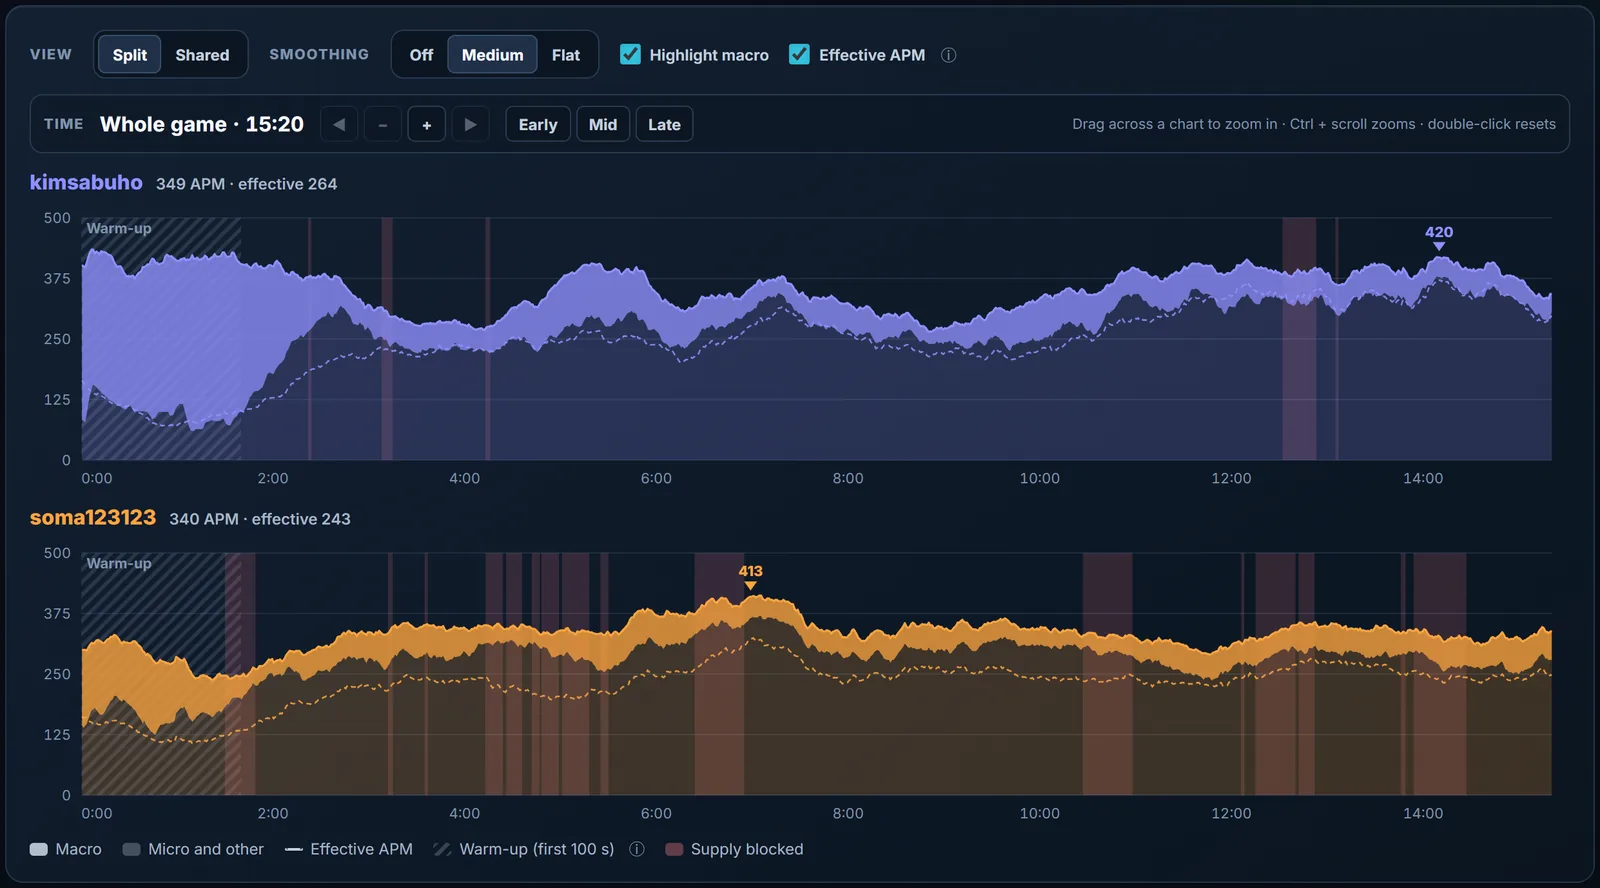
- 1Light: 349 APM, 264 effective.
- 2Soma: 340 APM, 243 effective.
- 3The hatched warm-up: the first 100 seconds, left out of the main figure.
- 4The dashed line: effective APM.
Minute 7–9: Check the build order
Open the build order timeline. Both players sit side by side, with your key timings set against your usual timings in this matchup and a name for each opening. The opponent's opening comes from the simulation, so you can see it even if you never scouted it.
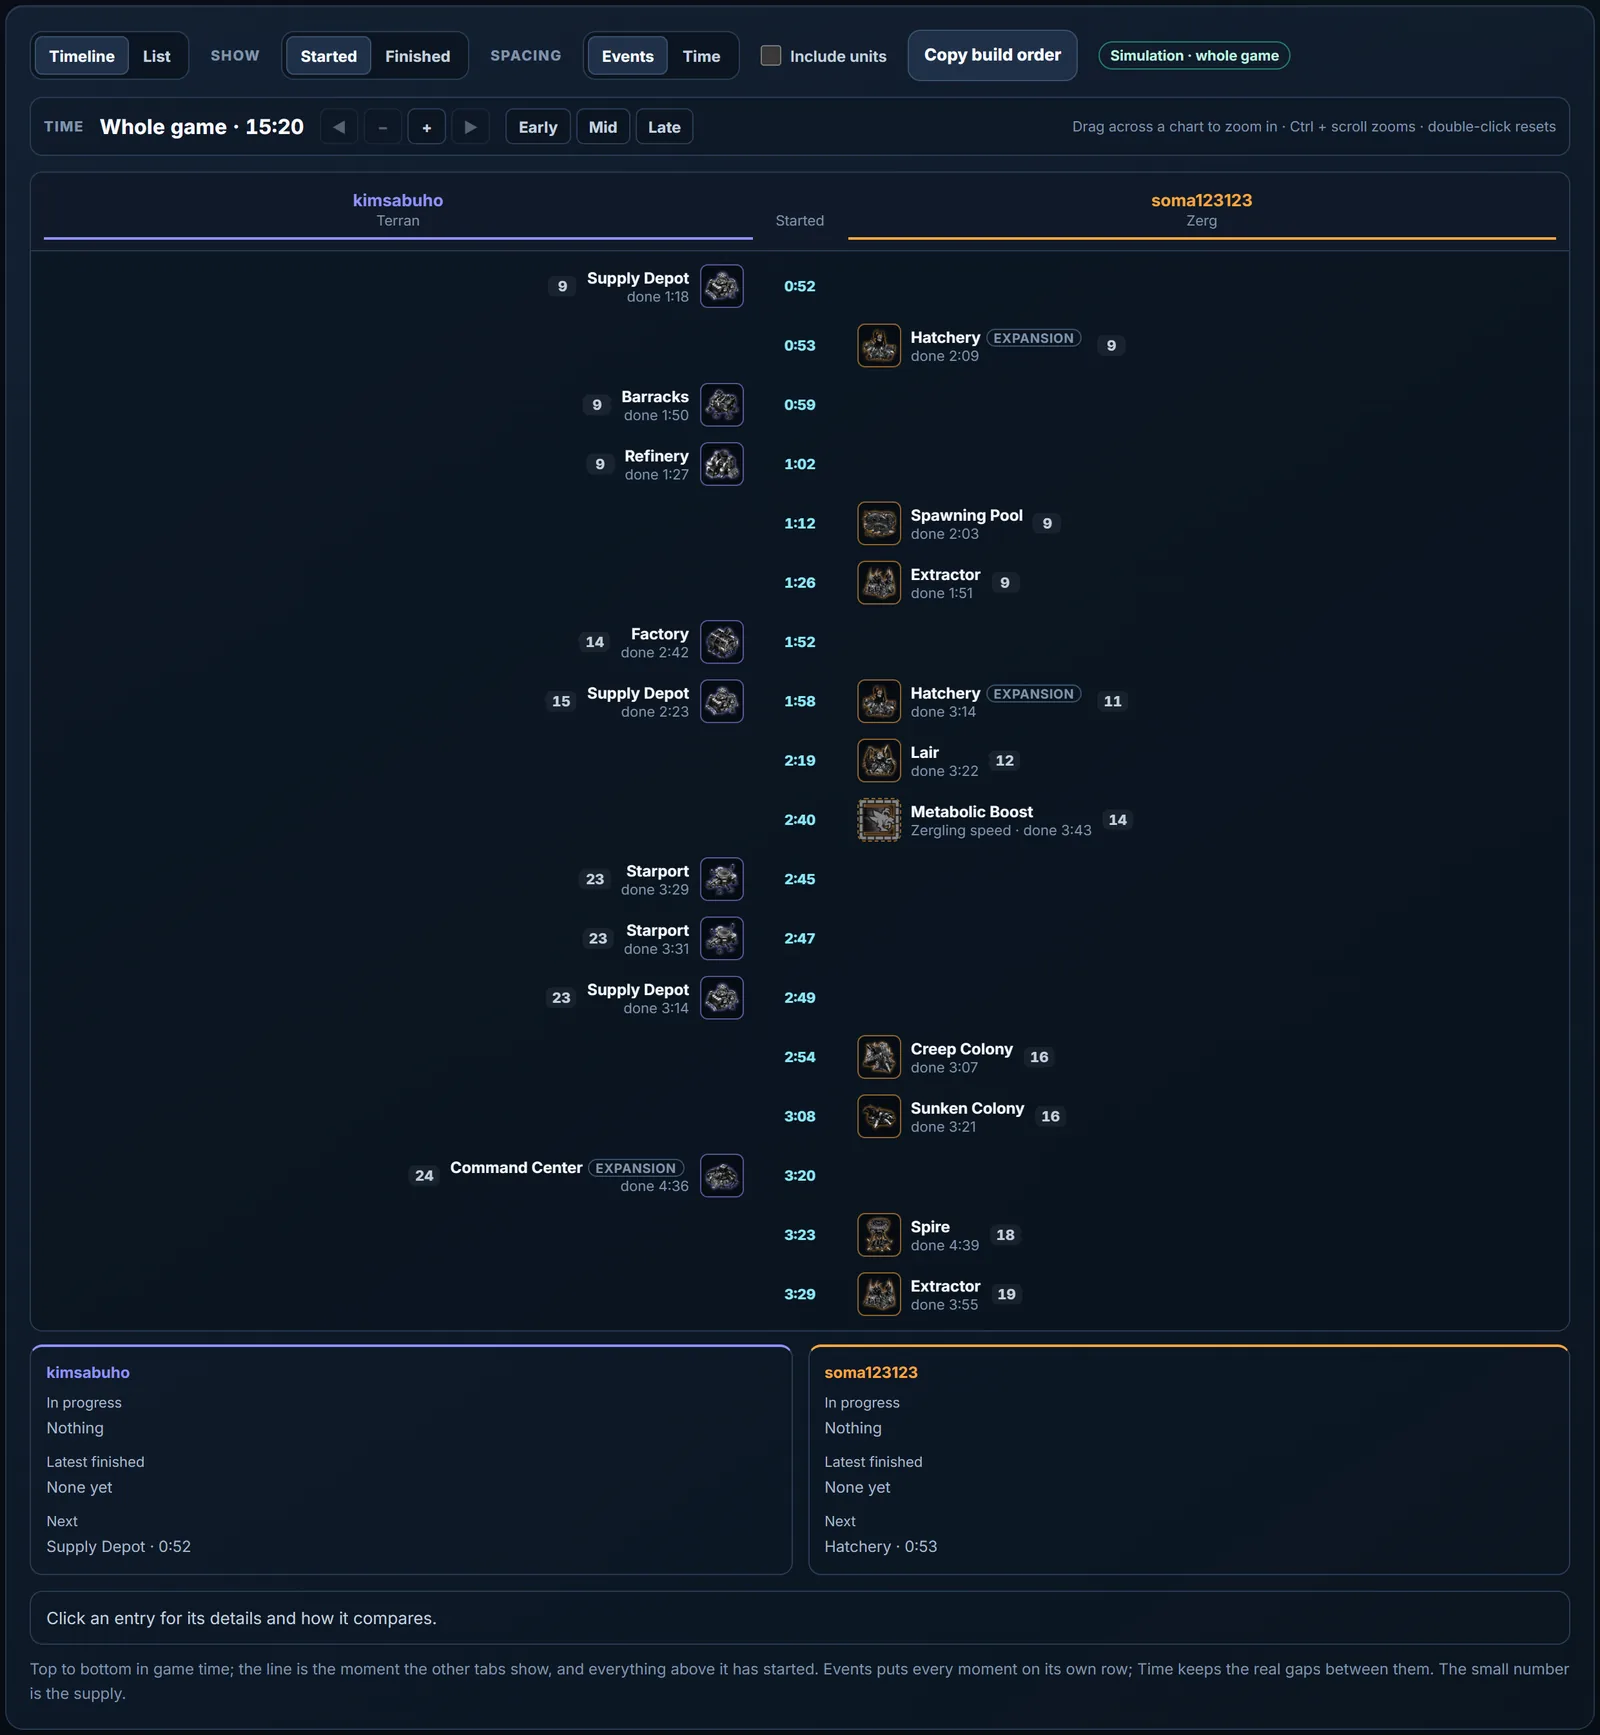
- 1Light's Terran build, each step with start time, finish time and supply.
- 2Soma's 9 Hatch at 0:53.
- 3Soma’s Spire at 3:23: read from the simulation, so it shows whether or not Light scouted it.
Ask two questions. Was my build on time compared with my normal games? And did their opening explain the decisive moments from Game at a glance? If so, the fix may be your scouting, not your mechanics.
Use Copy build order if you want to practise the build against the computer.
Minute 9–10: Leave with a habit
Turn the one thing to fix into a rule for your next five games. Keep it small and checkable:
- Idle workers: "Every time I move out, I glance at my base before the fight starts."
- Supply blocks: "Overlord or depot at the top of every production round after 30 supply."
- Hotkeys: "All production buildings on one key from the second one onwards."
After those five games, Automatic mode shows your numbers right after each one, so you can see whether the habit is sticking without doing another review.
Practice task
Review your last three losses in your main matchup with this routine. If One thing to fix names the same measure in two of the three, that is your training focus for the week.